


 |
| side view of the open pocket |


Thoughts-
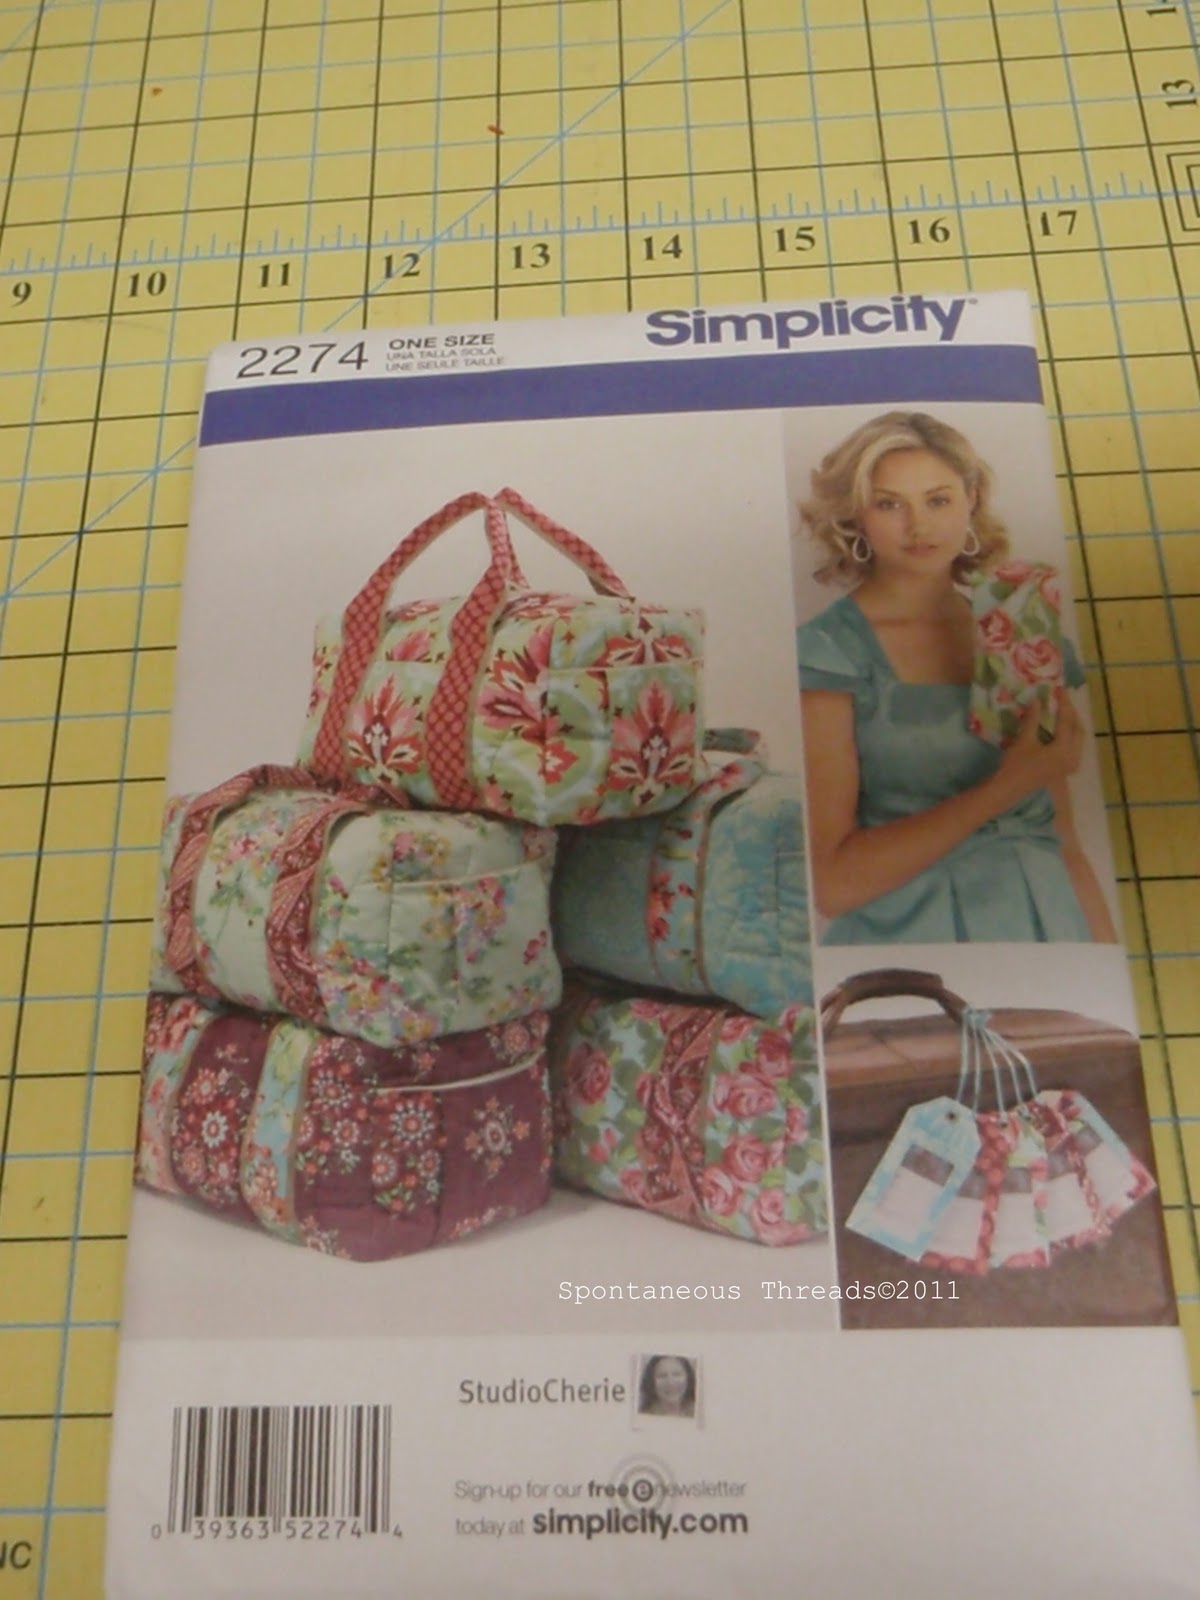
The pattern is straight forward, and easy to follow. There are LOTS of things to transfer from the pattern to the fabric so remember not to skip any (I know this to be true).
I can see no reason not to add two, between-the-handles, side pockets- they are the easiest pockets on the bag and there are no interior pockets. (In my next bag I will add a few interior pockets for additional organization).
May as well add 2 end pockets while you are at it. The zipper pocket is part of the pattern and would be a great place for a phone or something you didn't want to loose but still needed to keep at hand. (Like plane tickets, an e-reader, ipod). May as well add a second end pocket following the same directions for the zipper pocket (unless of course you don't have a second zipper) then the pattern is easily modified to make the pocket without a zipper. I used interfacing on ALL of the pockets. I highly recommend this, makes the pockets better, trust me. I opted for Pellon's heavyweight fusible interfacing works like a charm and doesn't add much to the overall bulk of the bag. It's way easier sewing through this than the the gazillion layers of peltex/interfacing/fabric/cording/zippers if you have ever had the pleasure of making any of Amy Butler's bags.
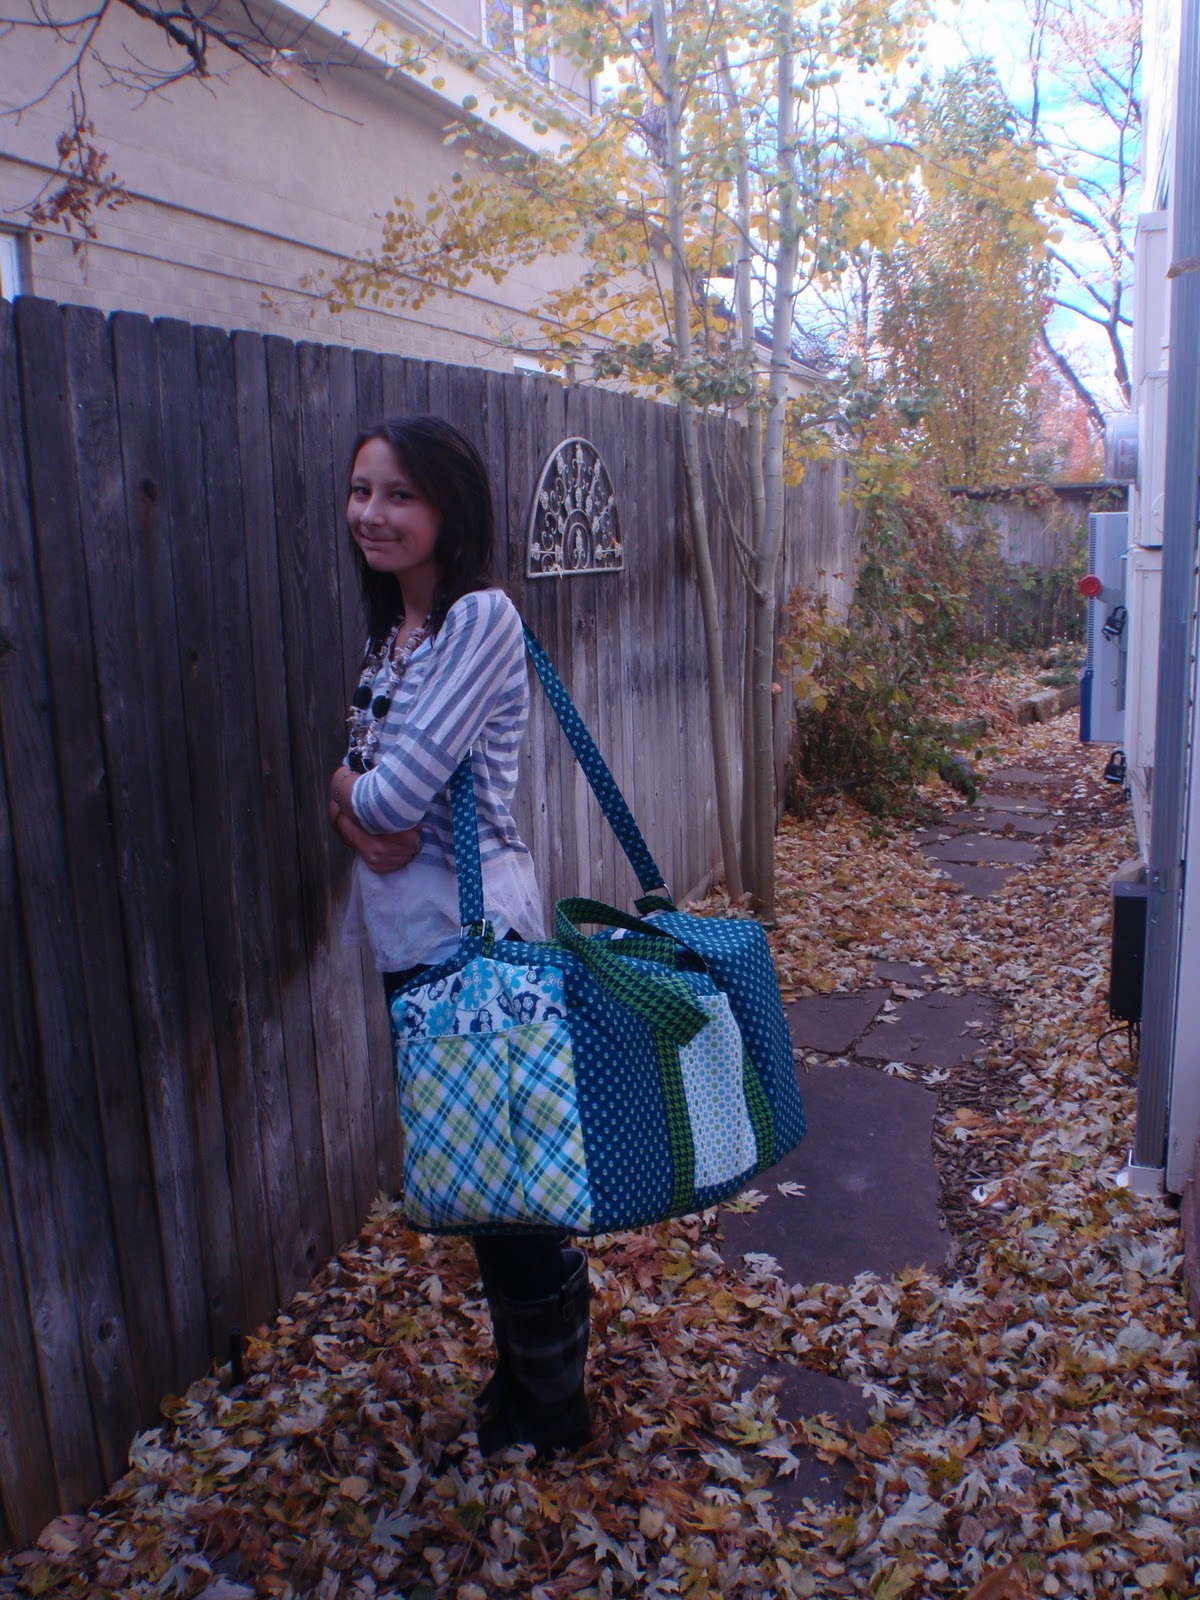
Don't be afraid to mix up your fabric if you want an eclectic look. Challenge yourself to use what you have on hand. I loved that I made this bag without a trip to the fabric store. And that it suits my daughter's personality to T. You could even make your own fabric from your scrap bin to go with a patchwork look. You could showcase the beloved scraps on the pockets or the straps…. the options are truly endless.
Adding the shoulder strap increases the versatility of the bag especially if you ever take it on an airplane where you might need your hands free to say, hold your ticket/book/passport/coffee/toddler. You will need some hardware, if you want to make the shoulder strap adjustable, but that is easy to come by and lucky for me, I had some on hand from a prior project. No hardware is needed if you can live with your strap at a fixed length. I made mine adjustable because I figure my daughter won't be the height she is now when she is an adult and if she needs a longer strap then she can make it whatever length she needs. The shoulder strap was constructed in a manner similar to the handles, with fabric, fusible interfacing and rows of stitching. I ironed the fabric for the strap in half length wise, opened it up, folded each side into the center ironed seam, ironed again and then refolded along the original ironed seam, enclosing the raw edges, stitching along the open edge, the opposite edge and a few additional rows down the center.
I will serge all the raw edges in my next bag prior to construction. Due to the size of this bag doing it after construction is like wrestling with…… well, you know what I mean. Serge first, or zig zag at least but do it before you start putting all the pieces together.
If you are looking for a fun, "luggage" bag to make, consider this pattern. I already have ideas for the one I intend to make for myself. If you get started now, you might even be able to get one done in time for the Holidays!
A great bag! I love your little alterations and I know your daughter will love it!
ReplyDeleteIt looks really great! I bet she will get lots of use out of it! I love the mixing of the fabrics!
ReplyDeleteLooks fab, and it's certainly nicer than a lot of sports bags out there.
ReplyDeleteWow, you have been bag sewing crazy! And oh my goodness that thing is HUGE but lovely. I love the scrappiness of all the fabrics, perfect touch!
ReplyDeleteWonderful bag! That is something on my to-sew list, too. Very nice!
ReplyDeleteRem looks so enthusiastic to be a model! lol
ReplyDeletelove the look of your bag. I have the pattern and am trying to do it. I just wanted to do if the main fabric needed to be cut on the fold and sewn as one piece or cut 2 pieces of the fabric.
ReplyDeleteThank you.