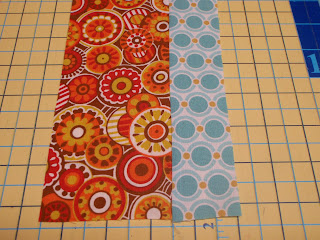
I have the month of October for the
12 Person Bee on Flickr. I get to choose a block design and then send material and instructions to the 11 other people. They get the month to finish the block and mail it back to me. I decided to try this
Starburst block. I'm not sure what happened BECAUSE instead of getting something that looked like this
I got this…….
hum…. I didn't really want a 1/2 circle. Well, for those of you who know me even a little, you know I have a wee bit of a problem
ignoring following directions. So, I did go back and read the directions and then realized (to my horror) that perhaps all the strips of fabric that I cut (without having first read the directions) may not be wide enough to make the block I wanted with the fabric I now had. So, I have modified these directions for the lovely ladies in the Bee and I think all is now well. (I am assuming you will read these mosifications…. ;-) ).
In you envelopes for the month of October you will find 16 pieces of fabric cut in different widths, all about 8" long. One template (purple blue) for cutting your 1/4 block from your strips. A few random goodies that have nothing to do at all with sewing. There is enough fabric for 1 block which will be 9" square when you are done. It will be constructed by joining 4 pieces, not 2 as per the original instructions- If you are LOVING this block and want to make me 2 go ahead, But I've made several already and pretty much, unless your scrap pile is taking over your life, you will need to add from your scraps for a second block.
You may substitute any fabric from your stash as long as the colors are within the color range I have selected- yellow, orange, red and aqua/turquoise- a bit of white as a background color but not as a main color. Green shows up in little peeks, but I would not like to add additional green as a dominant color. Please stay away from solids and batiks. (You'll get the color palette "flavor" with the fabric strips I send your way).
Please keep any fabrics you do not use. Unless you don't want them.
Please make one block.
Press 1/4 block seams to one side. Press block joining seams open (pictured below)- this reduces bulk right in the center of the block where the points meet.
Here goes- Variation on the Starburst Block for sewists challenged by written directions…...
There are 2 ways to start this block- it's really a personal choice, unless you have a bigger scrap you want to use from your stash. Scraps 4" or wider work great starting this way. With a wider scrap, you need only 3 pieces to make a 1/4 square.
 |
| RST, sew a 1/4" seam |
 |
| trim seam |
 |
| press open |
 |
| add 3rd piece, angling towards points |
 |
| 1/4" seam |
 |
| trim |
 |
| press open |
 |
| use template to trim to size (4 3/4" x 4 3/4")- set aside and make 3 more! |
otherwise, start this way, you'll need 4 pieces to make a quarter square.
 |
| RST, stich right along the edge, 1/4" seam |
 |
| press open |
 |
| Add 3rd fabric, RST, Stitch 1/4" seam (seam placed at left 2 pieces) |
 |
| Trim, (picture is rotated- sorry) |
 |
| press open |
 |
| not wide enough……. |
 |
| 4th piece added - NOTE points of fabric all meet at bottom |
 |
| line-uo template like this and trim(I found trimming with a rotary cutter and a big ruler works best) |
Then, when you have 4, 1/4 blocks done assemble as shown- The final assembly works for all blocks and differs from the Film in the Fridge directions. Please follow these-
 |
| 4 finished 1/4 blocks. Note bottom right block has a tiny triangle of fabric that won't meet in the center- that's OK! (lends character). The mix of fabrics lend to the scrappy nature of the block. |
 |
| Take top 1 1/4 blocks and sew them together, 1/4" seam. Press seam OPEN. |
 |
| repeat for other 2 blocks- I'm OK with the points not meeting perfectly!!!! |
 |
| Sew top to bottom, 1/4" seam, press seam open and pat yourself on the back. You don't even notice the points, just the overall effect! |
 |
| block 2 |
So, here are 2 blocks with a real mix of fabrics. I'm looking for an eclectic mix of fabrics and colors. I think once they all get together it will be fabulous. Notice some blocks have 3 fabrics and some have 4.
If you have any questions about assembly or construction you can leave a comment here. Hope this helps.


Ooh, this is going to be a pretty quilt
ReplyDeleteThis looks like fun! I can't wait to try it out.
ReplyDeletethanks for the explanation .. I like the idea, will have to prove
ReplyDelete