Welcome to day 3 of Paint Brush Studios 4th of July Patriotic Palette Blog Hop.
I will be hosting today so keep reading because there is a giveaway (or 2) at the end. If you've already been following along, you can see projects on IG @paintbrushstudio look for #pbstudio #painterspalettesolids and #RWBsolids.
As some of you know I have been lucky enough to be able to participate in several Paint Brush Studios events, including their March Madness bundle challenge and now, this. Some of you also know, that these solids are my favorite brand, hands down the softest hand of the quilting solids I have had the opportunity to use.
You may also know, that besides quilts, I sew garments and to me, seams are an elevated art form.
- [SEAM] noun- 1. the line formed by sewing together pieces of cloth, leather, or the like. 2. the stitches used to make such a line. verb- 1. to join with or as if with stitches; make the seam or seams of.
- taken as a whole, seams are as varied as quilt blocks with fun names to match (bias, flat fell, French, Hong Kong, inset, open welt, picot, piped, top-stitched, etc.)
- and as a design element: seams are absolutely essential to good construction.
I knew immediately that I wanted to use the 7 Painters Palette solids to try out a seam that doesn't immediately jump to most peoples mind, by making a quick, modern, versatile, patriotic, 2-sided project that could double as a banner or a table topper and that can be made in what ever size you like.

For my project, you have to meet the lapped-felled seam. (Like quilt blocks, some specialty seams are identified by several names). I like this particular combination as it really identifies the 2 basic components of this technique, lapped seams, followed by felled seams.
I'll walk you through the process but first you'll need to gather some supplies:
Fabric: I used 7 FQ in the following colors: White, Patriot, French Blue, River, Claret, Crimson and Tomato.

Thread: I went with a top stitch (28 wt) weight on the top, color matched to the background segment I was working on and Aurifil 50 weight 2021 in the bobbin.
Glue for basting
Iron and water bottle for spritzing (or starch, or Flatter)
Heavy weight paper (for triangle template)
Ruler, rotary cutter, washable marking pen
Ready? Set? Go (create)
1. Make a template. I made my triangle 10" wide by 6" tall. Please note that the 2 sides abutting the base have squared corners instead of pointy ones. You will see in the next steps why this is necessary. Those squared corners are 1/2" high. Because this "pattern" can be personalized, you can make your triangle template any size you choose, making your project uniquely yours.

2. Trace your triangles (using your sturdy paper template) onto the fabric you chose for those triangles. (Here, white). Trace as many triangles as your design calls for. I used 6. Cut out your triangles and put them aside.

3. Using your triangle height as a guide, cut a strip of fabric the width of your desired finished piece plus 2" by the height of your triangle plus 2" (for me, 22" wide (the width of a FQ) by 8" high). (The extra height will be necessary giving you some wiggle room when you trim). Then, place your triangle in the center of your background fabric strip and cut along the left side, using the edge of the triangle as the cut line. (This photo shows the cut background fabric aligned with the center triangle before any ironing or sewing. By lining things up before hand, you can organize your segments making it easier and quicker to iron, glue and then sew.


4. Take your triangle to the ironing board and iron a 1/2" fold, pressing to the FRONT of the triangle. See how nicely those squared corners line up at the triangle bottom.


5. Iron a 1/2" fold to the BACK of the right side background fabric (red in this photo). The remaining background piece should match the left side of the triangle if you are doing things correctly. (This is where lining things up in step 3 really speeds things along).

6. Nest the pieces into each other as shown. Placing the right side of the triangle and the right side of the background piece together allows the folded seam allowances to overlap, with the seam allowance of the triangle covering the cut edge of the background piece. (This is the first past of lapped portion of the lapped-felled seam). Put a little glue between the nested red and white 1/2" seam allowances , iron to set glue and keep things in place.

7. Fold the red background piece over the white triangle and re-iron the ironed background fabric seam allowance. I recommend at this time, pulling back the red background fabric and adding a little glue to the top of the nested white triangle fabric- and setting the glue by ironing again. This extra glue basting keeps all the layers in place without letting them move. If you choose not to to that, it still works, I just like the assurance of another glue basted seam. (Now both raw edges are covered and the 2nd lapped part of the lapped-felled seam is complete).

8. Take your freshly glue basted and ironed piece back to your cutting surface and trim the background fabric using the left side of the white triangle as your guide.

9. You will see if you've done everything correctly, you will have one background piece left that is exactly cut to finish the left side of your triangle.

10. Repeat steps 4-7 to complete the left side. Trim segment at top and bottom
11. Now, the fun part..... take your glue basted triangle/background to the sewing machine where you will sew 2 seams (This is the felled portion of your lapped-felled seam). One seam should be sewn very close to the Triangle background and the other just less than 1/2" away. The goal is to catch both lapped edges with these 2 seams. I used a matching red thread on the top (Front: full and detail)


and white thread in the bobbin (Back full and detail)


12. Repeat making segment "blocks" until you have the desired number of blocks all stitched and trimmed. You attach the linear segment "blocks" to each other with the same lapped-felled seam technique as was used to prepare each segment "block". I decided to alternate reds and blues, moving from lightest to darkest as I went.

Since both sides of this piece are finished it is ready to use once your mitered edges are done. The seam detail is truly worth the effort and makes a beautiful image with the light shining through. (Have I mentioned I have a thing for seams.....??). 
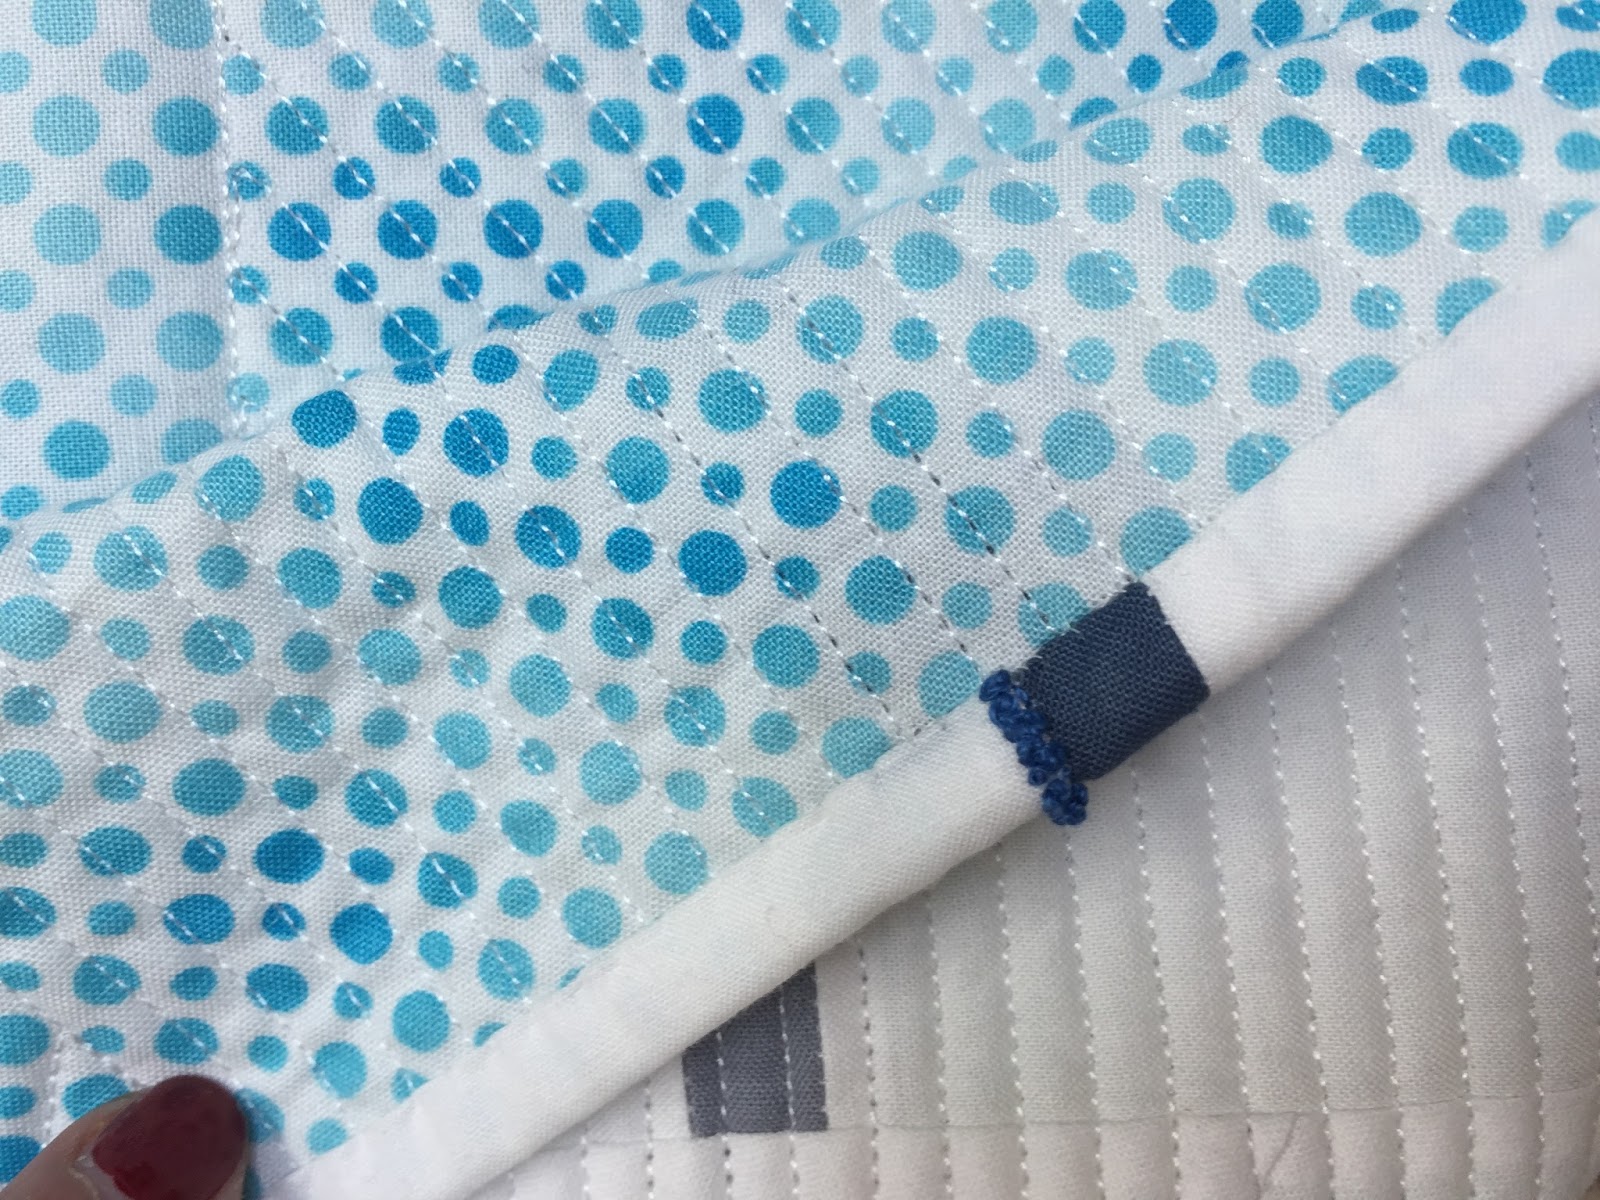
13. Finish the outside edges with your favorite mitered-corner technique (there are so many). Deep blue fabric showcases the mired corner from the back-side of the finished piece. Because of the construction seam choice the piece is finished on both sides and is reversible.
 |
Other reasons I wanted to explore this seam detail further, is, it is another way to construct projects using the Korean technique of Pojagi. I took a class a few years ago but struggled with the repeated trimming and back and forth ironing and sewing, as well as constantly having to pay attention to joining the 2 pieces (because with the traditional pojagi technique, one side has one seam showing and the other 2 seams showing). In the end I was not happy with the visual quality of my seams. Since Pojagi is reversible, you can't hide the seam detail- it's all about the seam! By using a lapped-felled seam you can glue baste all your seams first, then sit down at the sewing machine to construct your segment "blocks", without having to worry about what side of the piece your working on. Once the segment "blocks" are done, you then can rearrange them to your liking before sewing them all together in a finished piece, again without worrying about the sidedness of the seams.


Yes, this technique has quite a few steps, but it is so worth the extra effort. Once you make your first block the others go quickly! Depending on the size of your triangles and the width of your background fabric the possibilities for customization are endless. You can add more than 6 segments. You could add less. You could join side segments to make this bigger...... you can also use this seam technique to construct a multitude of other gorgeous projects including, but not limited to, curtains, scarves, clothing, and summer quilt/throws.
I hope todays tutorial has given you a few new things to consider and I hope if you explore this seam, you'll share your projects with me, on IG @spontaneousthreads use #seamsmodern
As promised....... and because you made it this far.
The GIVEAWAY:
- A winner will receive 7 fat quarters in the colors used in the Patriotic Solids blog hop. Each blogger is giving away a FQ bundle, so please make sure to visit each and follow their rules for eligibility.
- To be entered to win, you need to leave a comment here on my blog, letting me know what your favorite 4th of July activity is.
- The giveaway is open till June 30th at midnight. Winner chosen at random on July 1st and announced here and on IG (@spontaneousthreads)
- If you comment make sure I can contact you if you win. Failure to do so will result in another person being chosen as a winner. If you are a no-reply blogger please your email address and IG handle in your comment.
- Anyone can comment, but only US residents can win the FQ bundle.
BUT, there is MORE......
I made a little 2.5" charm pack of the left overs from my project. (see photo). I will send a second luck winner this charm pack and some fun variegated hand quilting thread just because. The same rules apply (see above), BUT this is why everyone should comment- I will happily ship this little gift internationally if that's how Mr. Random number generator see things lining up.
So, good luck everyone!
PS: Just in case you missed any of the blog hop, here's a list and the dates they are participating. And you really should go and see everyones posts, remember there is inspiration and fabric on the line.
6/22: Fabri-Quilt blog
6/23: Twiggy and Opal
6/26: OP Quilt
6/27 YOU ARE HERE
6/28: Pigeon in Pungo
6/29 Flourishing Palms
6/30: Live a Colorful Life
7/3: Peas in a Pod