Monday, October 31, 2011

It's time for the Bloggers Quilt Festival

Amy'sCreativeSide

I finished just in time- my last 16th birthday quilt for my last, next to be 16 years old niece.

This quilt has a few firsts, but let's take a look, shall we:
The front, Leeden's Quilt, completed, October 30th, 2011
close-up- free motion quilting

Quilt stats: Queen size 90 x 98"
 Original design- no pattern used- although this box pattern is very popular right now. I added the border to change things up.
Material: solid Kona Snow background; one charm pack and 1 jelly roll, Moda- Sugar pop
100% cotton ivory thread (from Italy) for the piecing and quilting
Batting: warm and natural
Machine quilted, free motion on a Bernina 1630
Start to finish: 3 months

The back, simple and you can really see the quilting

close-up, the back: using up all the pieces of the jelly roll. 
Things I learned:
That I really like the simple solid background especially when using such varied patterns and colors

That I can use a whole charm pack of a single line by a single designer and like the results (I typically pick and choose my own fabrics across lines and designers).
I did not use a pattern for this quilt; this block design is very popular and shows up in lots of quilts.
That I can use every piece of the charm pack and all of the jelly roll in one quilt
That if you spill your tea onto the quilt while your working on it, it gives you an additional reason to throw it in the washer and pop it in the dryer when you are done.

There are more beautiful quilts over at The Bloggers Quilt festival


Monday, October 24, 2011

It's all about choices

Ok, that about sums it up, choices- we've got lots of them and and each day we make even more. So, why not with  Flickr swaps too. First we choose to join a swap. Then the swap moderators choose to let us participate, or not. We receive our partners and then, secretly look through their choices (Mosaics, likes, dislikes……) For this swap, round 2 of the Goodie Bag Swap, is no different- more choices, 2 specifically. For me, both bags were "advanced" by my standards and my choice, (you could choose, simple, medium and advanced) and now that I have made 2, I will let my partner choose which bag she would like to have. (Which then saves me from choosing for her). Or, perhaps I'll let you readers choose which bag she should get- choices, choices…….. so MANY choices. I don't even know if my partner will find her way to this blog post. Or if she does, perhaps she will choose not to comment. I'm hoping she will, because she will have a hand then, in choosing which bag she will receive. I guess if she never finds her way here- well, then, dear readers- you will choose for her- so choose well!!


Choice #1- Sweet Harmony Bag by Amy Butler (all was not harmonious when making this bag- did she choose that name as a contradiction in terms or the sense of relief one felt upon completion). The sheer volume of pattern parts to cut out was phenominal. When pattern pieces were stacked on top of one another the pile was almost 3" tall. That Lady sure loves her interfacing.
pieced exterior pocket with piped cording
Kona coal and various yummy quilting cottons
13 x 9 x 4"

other side- also pieced exterior pocket

"secret" cell phone pocket

interior zippered and open pockets. Roomy central pocket. It's fall, so Alexander Henry's apple fabric used as the lining seemed very apropos. 


Choice#2: Cross body Bag, original design. I got real friendly with my seam ripper on this bag after I realized that I had included one too many pieces (did I mention there were lots of "pattern" pieces with this bag too) when sewing the lining and ended up with a zippered pocket without a back. I mean a project isn't a PROJECT without a lot bit of seam ripping it "seams". Being directionless and working from a sketch of-my-own-making often lends itself to considerable back-tracking. I had an end product in mind when I started, I just took the scenic route to get there.
One side with open (magnetic snap) pocket. Ikea decor weight fabric (grey) with chartreuse/ mustardy-yellow corded trim. Zippered main bag compartment (top). Teal strapping.
13 x 11.5 x 3"

reverse side, Ikea decor weight fabric, grey and white, zippered outside pocket. Ikea fabric fussy cut for front and back to maximize pattern layout and scale.

"hidden" cell phone pocket- borrowed that idea from the Sweet Harmony bag. 

close-up of cell phone pocket. The bag's main grey color is more "true" in this photo. The closure is velcro with a decorative button sewn over the top.

interior side pocket, with a space (far left) for a pen(cil).  Pockets  inside  big enough for a cell phone or small pad of paper.
Despite my whining about the (dis)harmoniousness of the Amy Butler bag and my seam ripping extravaganza with the cross body bag- I did really enjoy both the process and the final product- the journey, you might say.  I might even try to make the Sweet Harmony bag again- but this time I'll try a little meditation (ohm) before I tackle all that interfacing.

So dear followers/ partner/ partner who is also a blog-follower, which would you choose?  Let me know which one and why- remember, it's your choice.

Wednesday, October 19, 2011

An apple a day

Sewn Spaces Swap for this round is pin cushions. The mosaics people posted are really inspirational and the artists (yes, and I do mean artists) who have created some of these miniature wonders have talent beyond reason. You can check out some of these beauties for yourself at the Sewn Spaces Swap Flickr page. My partner for this swap lives in New England and like myself ( I grew up in Massachusetts), probably is right in the middle of some of the most glorious fall colors in the world. It's one of the things I miss, living now in Colorado. It's definitely the season,  Fall brings with it some of my most favorite colors and foods- squash, pumpkin, apples. So, I thought that perhaps, given his common link, my partner wouldn't mind if I drew upon some New England inspiration for her pincushion. Now, I'm probably dating myself, because it's been a few years since I have actually seen this (for me) quintessential New England tradition in action. I'm hoping somewhere back home, they still do this with their apples.
Bobbing for apples anyone??? This is a miniature (The plant next to it is Rosemary) metal container, complete with handles and in it, felted water and some yummy (looking) felted apples. Their leaves are straight pins. 

Close up  of the apples, bobbing away in their metal tub.
I was so proud of myself and then, a moment of panic…… the group is called the Sewn Spaces swap, and dang it, there wasn't a sewn thing in this pin cushion. My partner has all kinds of whimsical examples in her mosaic, but nearly all had some sewing in/on them. So, I figured, another apple, this one sewn probably would be well received.
Red Delicious apple- sewn with different quilting cottons. The bottom is weight to keep it up right. The stem and leaf are felt. 
another view of the apple pin cushion hanging in the apple tree. (I love that apple fabric and couldn't resist using it in this project).
and just for some perspective, the sewn apple, which is about the size of a store bought red delicious apple, is about the same width as the bobbing for apples pin cushion and double the height.
I sure hope my partner likes them apples……...

Thursday, October 13, 2011

Pretty {little} Pouch Swap- do you want it now???

Dear Partner,
Thank you for being specific on your P{l}P swap sign up sheet.  Knowing what you wanted, ('cause you said) and given the freedom to create something that I'd love too (you said that too), really inspired me. I did read your profile- it helped me narrow down color choices. I followed your responses on the Flickr page to get a feel for certain likes and dislikes. Having a partner that actually comments is REALLY helpful, so thanks again. I know that for this round, Dear Partner, that if we want to send goodies that they have to fit in the pouch made for you. I deem that totally unfair, because you asked for something small. So, I bent the rules, I admit it. In addition to what you "wanted", I made you an Audrey pouch, and into the Audrey pouch will go your ipod pouch with room to spare for a few additional goodies. I hope (fingers crossed) that you like your surprises. Partner, we can send these pouches, as soon as we are done with them. So, Dear Partner, do you want them now?????
Best,
Stephanie
ipod case with tiny chevron triangles. The carrying strap is also pieced.

Close-up of little 1/2 square triangles, Yup, they are tiny.

The back of the case has some bright orange and yellow patchwork.

inside the top flap is a 1/2 pocket for your ear buds

…...and a small pouch for the goodies (not much fit into the ipod case except the ipod). A bit of embroidery surrounds the patchwork pieced cross.  Fun zipper pull. Natural linen and quilting cottons.

Back/front of the case. Natural linen and quilting cottons.


Saturday, October 1, 2011

The Starburst tutorial

I have the month of October for the 12 Person Bee on Flickr. I get to choose a block design and then send material and instructions to the 11 other people. They get the month to finish the block and mail it back to me. I decided to try this Starburst block. I'm not sure what happened BECAUSE instead of getting something that looked like this

I got this…….


hum…. I didn't really want a 1/2 circle. Well, for those of you who know me even a little, you know I have a wee bit of a problem ignoring following directions. So, I did go back and read the directions and then realized (to my horror) that perhaps all the strips of fabric that I cut (without having first read the directions) may not be wide enough to make the block I wanted with the fabric I now had. So, I have modified these directions for the lovely ladies in the Bee and I think all is now well. (I am assuming you will read these mosifications….  ;-)  ).

In you envelopes for the month of October you will find 16 pieces of fabric cut in different widths, all about 8" long. One template (purple blue) for cutting your 1/4 block from your strips. A few random goodies that have nothing to do at all with sewing.  There is enough fabric for 1 block which will be 9" square when you are done. It will be constructed by joining 4 pieces, not 2 as per the original instructions- If you are LOVING this block and want to make me 2 go ahead, But I've made several already and pretty much, unless your scrap pile is taking over your life, you will need to add from your scraps for a second block.

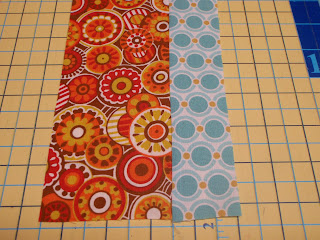
You may substitute any fabric from your stash as long as the colors are within the color range I have selected- yellow, orange, red and aqua/turquoise- a bit of white as a background color but not as a main color. Green shows up in little peeks, but I would not like to add additional green as a dominant color. Please stay away from solids and batiks. (You'll get the color palette "flavor" with the fabric strips I send your way).

Please keep any fabrics you do not use. Unless you don't want them.

Please make one block.

Press 1/4 block seams to one side. Press block joining seams open (pictured below)- this reduces bulk right in the center of the block where the points meet.

Here goes- Variation on the Starburst Block for sewists challenged by written directions…...

There are 2 ways to start this block- it's really a personal choice, unless you have a bigger scrap you want to use from your stash. Scraps 4" or wider work great starting this way. With a wider scrap, you need only 3 pieces to make a 1/4 square.
RST, sew a 1/4" seam

trim seam

press open
add 3rd piece, angling towards points

1/4" seam

trim

press open

use template to trim to size (4 3/4" x 4 3/4")- set aside and make 3 more!

otherwise, start this way, you'll need 4 pieces to make a quarter square.
RST, stich right along the edge, 1/4" seam

press open

Add 3rd fabric, RST, Stitch 1/4" seam (seam placed at left 2 pieces)

Trim, (picture is rotated- sorry) 
press open

not wide enough…….

4th piece added - NOTE points of fabric all meet at bottom

line-uo template like this and trim(I found trimming with a rotary cutter and a big ruler works best)


Then, when you have 4, 1/4 blocks done assemble as shown- The final assembly works for all blocks and differs from the Film in the Fridge directions. Please follow these-
4 finished 1/4 blocks. Note bottom right block has a tiny triangle of fabric that won't meet in the center- that's OK! (lends character). The mix of fabrics lend to the scrappy nature of the block.

Take top 1 1/4 blocks and sew them together, 1/4" seam. Press seam OPEN.

repeat for other 2 blocks- I'm OK with the points not meeting perfectly!!!!

Sew top to bottom, 1/4" seam, press seam open and pat yourself on the back. You don't even notice the points, just the overall effect! 

block 2
So, here are 2 blocks with a real mix of fabrics. I'm looking for an eclectic mix of fabrics and colors. I think once they all get together it will be fabulous. Notice some blocks  have 3 fabrics and some have 4.

If you have any questions about assembly or construction you can leave a comment here. Hope this helps.