Showing posts sorted by relevance for query do you see what I see. Sort by date Show all posts

Thursday, June 12, 2014

Do you see what I see


A Colorado wedding, a beautiful night, a perfect venue and a very fun and meaningful quilt.
Front
Details:
"Do you see what I see"
58" x 71"
Original Design
Back
100% Kona cotton solids for the grays and the whites (kona white, snow, ash, steel, medium gray, coal, charcoal, black) and various yellows (kona curry- solid) misc. 100% cotton quilting prints, remainder.
Thread: Aurifil 100% cotton 50 wt, #2021 (off white) piecing- top of quilt: #2021, and #4665 (variegated black), #1158 (med. gray) and #2625 (light gray) for the quilt bottom, #2140 (mustard yellow). 
Batting: Hobbs Heirloom cotton
Backing: I used every scrap left from piecing the front to complete the back. "Randomly" pieced (because you can see some planning if you look closely. 
Binding: split, Kona snow (top part of quilt) and Kona charcoal (bottom part of quilt).
Detail, binding. I also switched thread color- top and bottom as seen here.

Quiting: Bernina modified stitch #4;  each "bow-tie/butterfly/firefly" is free motioned quilted differently in a mustard yellow thread (#) used in the spool and the bobbin so that you can see the outlines of the stitching on the reverse side of the quilt.
Front, detail

Front, detail

Back, detail (yellow thread used in bobbin)
New to me: I used every scrap of left over fabric from the front piecing/cutting on the back. As I was cutting and piecing I kept a basket near and put all the scraps together. I then pieced and randomly placed them all on the quilt back. It was fun to see the basket empty when the back was complete. Additional solids and printed gray fabrics were added to complete the quilt back.
Back, close-up

Back, close-up
I asked my few followers on Instagram if they could offer up some suggestions for the quilt name while it was still a work in progress. Several thought of fireflies, one commented on the transition from light to dark, other, bow ties, or even butterfies. Thinking about all of this and the fact that one of the people getting married is the Manager of Public and Professional Relations for The Rocky Mountain Eye Bank,  the name "Do you see what I see" seemed more than predestined. 
The quilt is the perfect size for sitting on the couch and I heard that their living room is painted a sunny yellow color. I hope this quilt holds a lifetime of stories, each as unique as the couple getting married.

Tuesday, February 15, 2011

Birthday goodies- oh yeah!

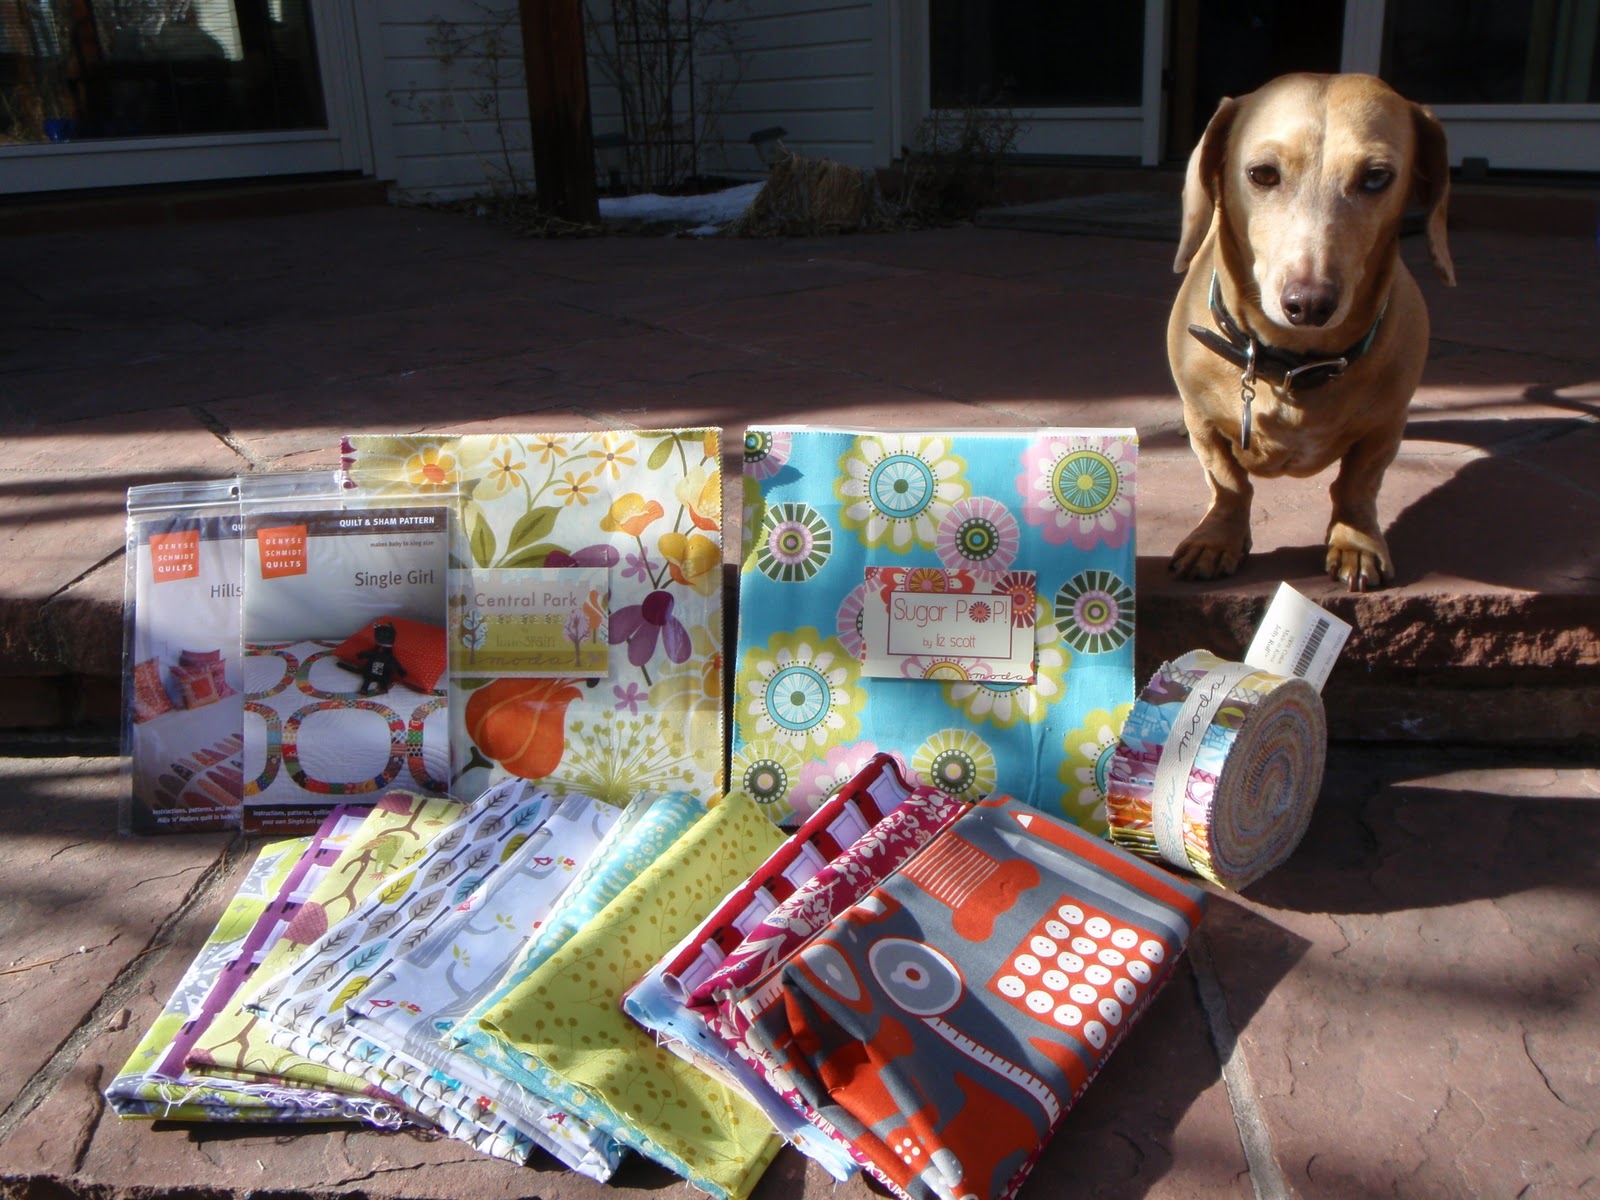
Thank you to my wonderful sewing group that showered my on my birthday with a surprise lunch at Bones and a gift certificate to my favorite sewing/craft store Fancy Tiger (Denver, CO). I went today and spent my gift certificate and this is what I got. A bit about my selections.......


First, my ever present sewing helper, Sandi wants you to know she likes the fabric too. (Even though I did not buy the fabric with the dogs on it- sorry Sandi).  The front pattern,  (my first quilt pattern in quite some time) is Single Girl is by Denyse Schmidt. I am participating in the Single Girl Support Group and making this quilt with a group of other quilters. I have to figure out what colors I want to work with and what size quilt I want to make. You can follow our progress here. Then I bought some layer cakes (Kate Spain Central Park and Liz Scott Sugar Pop) and a jelly roll (more Kate Spain).  (I thought medicine was the only other profession that had food references, but I'm finding that sewing is right up there too). I have never purchased a whole line of fabric before so this is a treat. I'm not at all sure what I am going to make with them.  And then I loaded up on other fabrics I liked. Thank you to all my sewing girlfriends for such a wonderful, thoughtful gift.
Now, here is the good part my sewing compatriots (and I know who you are- especially since I sent you the email to come visit me on my blog).  If you will follow me on my blog, and leave 2 comments anywhere on this blog, I will make you a surprise treat. (Trust me it's a big surprise since I don't know what it is yet either). (I know I am most fortunate that some of you follow me already- so if that's you, please leave 3 comments on the blog and we'll call it even).  If you have a blog and grab my button for your blog (or website) and then shoot me an email - spontaneousthreads@gmail.com - letting me know where in cyberspace you put my button,  I will visit your blog/website, check it out, follow/comment on your blog/website and I will make you 2 treats.
Why oh why am I making you do this??? Well, I'm hoping to get the creative juices going and have a page on my blog for our sewing classes and creations. You will be able to check on them here, see the projects and get your supply list etc. etc.
It might be a good idea for you to book mark my blog since come sewing season 2011-2012, this is where you will go to see what's coming in sewing land. You can also check in on my progress (if you want to know what I'm doing when I should be making dinner or doing laundry), with the Block-a-palooza and the Single Girl Support group (I just know this may be puzzling some of you- the quilt pattern is called Single Girl, the group of quilters is the Support group, hence- The Single Girl Support group. I think it's a clever name myself).
Now, if I am so lucky to have someone stumble across my blog and do all of the above (follow/comment/grab my button and email me about it) and you are not in one of my sewing groups do not despair! All you have to email me your info or provide me with a way to contact you and I will put a surprise in the mail for you too. Unfortunately, I am going to have to limit this beyond my sewing group to the first 25 responders (I should be so lucky).
It's a beautiful day today, it's going to snow this weekend- typical, but, that means I can sew!!!

Thursday, January 1, 2015

Bee Sewcial

The buzz…...


And I'm up to bat.
Derived Inspiration on a group level. Eeeeek! Follow along as we try to figure each other out on Instagram #BeeSewcial.

OK, here goes all you creative people:
The inspiration: The Chihuly Exhibit at the Denver Botanic Gardens. I love the linear but not rigidly linear aspect, and the unexpected, like the swirl of glass in the purple/green composition. I LOVE the blues in the top 2 photos and the reds behind them (And I picked this design and inspiration BEFORE Marsala got named the 2015 Pantone Color of the year- damn I'm good).

I digress, back to the story-  There is so much going on and yet it's still peaceful. (You can see more pictures of the exhibit on Instagram (#Chihulydenver) if you need that Chihuly fix or more inspiration.


What I'd like is the pieced equlivant of 2-12.5" blocks more or less, of your best improv interpretation on the theme above. You can solve that any way you like, for instance, by making several little blocks/rectangles, or one big block/ strip/rectangle, I don't care.  It's supposed to look improv when the whole thing is pieced together.  I may adjust your blocks once I get them to make them fit and be more cohesive but please let your inhibitions go and have fun with this. Please don't trim as I will be doing that as I piece, so no worries if your finish is an irregular shape. What I don't want to end up with is a stack of perfect 12.5" squares….. and perhaps no raw edge appliqué as I like the look of a pieced quilt.

Colors: I LOVE the colors in the first 2 photos, the different startling blues against the brick red.  I want you to play with the color palette. Go play! (When I put the top 2 pictures through the Palette Builder I got 3 different "reds" and 4 different "blues".

Below are some colors that inspire me on a personal level. Although the Chihuly exhibit is done out of doors, I want to stay away from greens in my quilt, but you have my permission if you NEED to use a bit of green to do so. (I do like that yellowy-green but not deep forest greens just in case you're wondering).

Remember we are working with solids only, and 100% quilting cotton. I have lots of Kona solids in my stash and will be using those, but again use what you have as long as it's solid.  I think all the colors and texture will only make the quilt more remarkable.
Design Seeds March 31, 2014
click on this link to get the "bigger" picture
 And IF I can get these creative pieces put together, I will enter it into the yearly Pantone Color of the Year Quilt challenge as a group quilt. So, Latifah, it may not be the first Marsala Quilt of the year, but it will be A Marsala  Quilt finished this year. Once done, we can all raise our "virtual" wine glasses and toast that finish!!

And here are my attempts just so you know I'm working on it. But do YOUR thing, you don't have to try and do what I'm doing. And yes, Hillary, if you want to try and get this into circle form you have my permission (plus I'm dying to see how you'd accomplish that).
some curvy

more straight
flipped horizontally the upper right piece looks like Islands or mountain tops...

3 separate pieces This is taken indoors without nice lighting.

some of the fabrics I used, see below


Some colors I selected using the Kona color card in case our monitors are not syncing as they should.
orange:Tangerine/kumquat and flame
yellow: corn/papaya/citrus
pink:azalea/camellia/pomegranate/cerise/sangria
red:brick/crimson/wine/ruby/chinese red/paprika/tomato/coral
blues:(dark) teal/caribbean/cyan/nightfall/prussian/celestial  (light) robin egg/baby blue/aqua/azure/surf

Remember your masterpieces are due 6 weeks from Jan 1, so in my hands by February 12th. Please post work in progress and any other questions you might have on IG and Flickr tag #BeeSewcial. My smart phone isn't smart enough to get discussions on Flickr through the app, so if it's important ask me on IG I'm @spontaneousthreads and we're #BeeSewcial. 


Saturday, June 13, 2015

Labeling in the 21st century

I am a firm believer in quilt labeling. I am because I can't tell you how many times in my rush to get things done and out the door/into the mail, I have neglected to do this.

In the past I hand stitched a cloth label to the quilt back. It typically had the recipients name, quilt title, date and my name on it. It could easily be removed if someone wanted it gone. I tried to get a bit tricky and sew a few through stitches into the label (stitching all the way through to the front) and although it might slow someone down the label could still be easily removed.

I then took to stitching my name and date onto the edge of the quilt, in the same color as the "negative space". I used a preprogrammed alphabet on my machine. Again (and only because I had to once), this too can be removed. Trickier, takes longer, but it can be done. I will continue to do this regardless of it's drawbacks. 2 labels are better than one right??

So, I got thinking. What if I could in some way, add my "Spontaneous Threads" title too. What if I could do it in addition to these other labeling techniques. How would I do that? Some have had labels printed (Spoonflower is a good example) and then they are pieced into the backs before quilting. That's one way, and a good one at that. It's permanent.  But sometimes I can't decide on where to label, or heaven help me, I forget all together….. then the back is pieced and now what?

I turned to my friends at Versatranz for some help. They make commercial heat press labels for teams, schools etc, etc. I spoke to a very helpful young lady who guided me through the ins and outs of designing custom labeling and we came up with something that works perfectly for me. I knew going in that I wanted something reflective. They had something that would fit the bill. Although it's not as striking as the fabric I've been using, (I'm guessing its a nano particle density thing), it's pretty cool none the less.

I got a single run (about 70 labels total), knowing that I may be spending money for something that wouldn't work. The person who helped me told me, several times, this was not an iron on process. I nodded my head, we were on the phone after all, she wouldn't know I also had my fingers crossed that perhaps it wouldn't matter. You see,  I do have an iron and a sense of adventure (even with quilting) and she really didn't have to know that I was going to ignore their only use a heat press directions and give it a try regardless. It's my money and I'll try if I want too.

So, once the labels arrived,  I heated up my Rowenta, got out my test fabric and gave it a whirl. I decided I should start my (mis) adventure by attempting to follow the directions for the type of label/fabric I was using. It was an excellent place to start.  It worked like a charm. I can apply it to a piece of fabric or a pieced quilt back. I can make it go exactly where I want it.  I can quilt right through it like it wasn't even there. It's washable and lightly reflective. It's ME!!!!

If YOU decide to go this route a few things you NEED to consider:
Cut out the labels individually. Don't try and iron directly from the label sheet. If you order any you'll see what I mean.
Use your iron's hottest setting and some muscle. Remember you are the heat press, be the heat press.
I counted out the time in my head, One-one-thousand, two-one-thousand etc. This seemed to work just fine.
Don't move your iron back and forth, just place and press.
Which then states the obvious, if you can't press in place on your fabric at the highest setting of your iron for 10-12 seconds without completely ruining your fabric then this is not the type of label for you (the disclaimer).
Each label cost me about $1.50, I can't remember if that includes shipping but I think it does. (This amount is based on my design and the material I chose). A small price to pay to have your quilt labeled and done!


Monday, January 16, 2012

You CAN teach an old dog new tricks

I got a iphone a month or so ago. I love it. I made it a soft iphone case, just in case,  (it gets cold here, where I live).

It does things I never knew I wanted "done".  I have lunch with friends and get all kinds of hints on how to "use" my phone and we share App's, (especially the free ones). We do this quietly so as not to scare away nearby diners. There are a few that have added to my "cyber" sewing experience. Allowing me to keep in touch with some of the wonderful new friends I have met this past year.
So, here are the ones I find useful in the sewing/quilting/swapping realm- I would love to know, if you have these, or if you get them, what you think…….. OR better yet, if you have ones I NEED to have too. Share!!!!
(These are all available for FREE via the App Store)
Flickr for the iphone:
Take a picture and post it to your Flickr page complete with comments, tags and other fun info. The one thing it doesn't do is let you post your photo to a group. Perhaps if enough of us complain they might add that in an update.
QuiltCalc by Robert Kaufmann:
You are just going to have to play around with this to see all the fun things it can do. Make sure you have enough time to check it out.
Jo-anns app:
Despite my love for my LQS, I do need to go here for buttons, notions, rotary blades etc, etc. Their app has mobile coupons- directly to your phone, within the app. You just show it to the check-out cashier and voila! No more forgotten coupons….. there are other features with this app but I primarily use it for the coupons.
USPS Mobile for the iphone:
I just discovered USPS Click-n-ship on my computer (right before Christmas) and couldn't believe that I could skip waiting endlessly in line at my post office and order the boxes, print the labels (with free delivery confirmation) and even have my mail man come get my packages right from my porch. And this handy iphone app lets you do the same right from your phone, including scanning bar codes and QR codes on packages. This last feature is beyond cool. First you print your labels from your computer/printer. They will have a bar code on them. The you open the USPS mobile app on your phone and scan the bar code. Then you can track your package right from your phone without having to type in all those numbers. ;-) to see if your package got to its intended destination.  You can order free boxes and schedule a pick up from your phone as well as look up zip codes, calculate shipping costs and find a post office near you (if you still want the whole "in-person" experience).

As you can see, I am easily impressed and eager to find more fun helpful things to do with my phone. I am certain there are more wonderful apps out there and as I get ones that have some connection to sewing/quilting/life I'll pass them along. Please do the same.


Saturday, February 21, 2015

Keeping it real, part the first.

I made a few new years quilting resolutions which I will briefly recap
1. two quilts made from stash only (tops from scraps only), back from stash
2. Submit quilt to Marsala Pantone Quilt challenge
3. Surrender quilt top and back to a long arm quilter

All doable for sure.

My progress so far has surprised me. Happily I might add. I guess I didn't contemplate seriously my scrap bins until now. So here goes- when you make as many quilts as I did in 2014, you accumulate scraps. Especially when you are quilting from inside your head. I save what I think might be usable pieces and I have scrap bins for prints and solids. Since I quilt with both I have a healthy supply of both. BUT could I actually make a quilt with scraps from just my scrap bin?
The answer is yes!
The "Before" working scrap pile. I found a few more solids gray when I cleaned out my scrap bins further. I had already started  piecing (I had a 12 x 20 inch piece going)  when I remembered to take a photo, but I wanted to show my starting point regardless. (One of my last years "resolutions" was to document more, so I'm documenting). Note:  What looks whites are actually very pale grays.
 I did several quilts last year that prominently featured gray. In many shades (perhaps even 50). I got them all out and realized that most were from quilts that used various widths of cut straight of grain strips. And some squares.  I got started by sewing the longer strips together in 2's. Usually in contrasting grays. I didn't have that many longer strips so that lasted for a little bit. Then sewing the shorter pieces together, also in pairs. Until they were done. Then cobbled as many grays together as I could in the improv piecing spirit of the project. I was also lucky to be in the midst of a great, creative Bee called Bee Sewcial, and one of my bee mates (thanks Hillary) sent loads of scraps along with her bee blocks. In that pile of lovelies was several long thin strips of yellow. I used a wee bit of that too!
working in grays and a bit of yellow. (The Bee Sewcial blocks sneak peek on the right)
The gray pile dwindles (not yet vanished/ vanquished) but what I have is not yet big enough for a quilt. (At this point it's probably 30 x 48 and if you know me even a little, you understand that I  like my quilts to be functional, so unless I was making this for my dog, it hadn't yet reached a size I could call done).
So, last year I also made a few quilts that featured whites, off whites and varieties of near white prominently. So, I dug out those scraps and got to work.

I think if you look closely you can see I had all kinds of solid "whites" .  I know for sure there is Kona white, snow and oyster. There is also a RJR solid "white" from the Cotton & Steel collection (I'm pretty sure that had a much more creative name than white for their fabric, but the name escapes me). Who knows what else.  I began piecing the remainder of the quilt top. Like with the grays, I start using the larger pieces first. I had so many, piece of cake.

Throw in the orphan grays and a pit of yellow and of course the "lifeline" in black. Oh, look how far I got with the big pieces! What! no more big pieces. But there is still more to do.


So, little by little the remainder of the "white" scraps are cobbled together and added to the quilt top.


Until the top is done! All with scraps. Not an additional piece cut. And a very real sense of making do. Improv at improv's roots. Short of trimming the larger areas square, there was very little that remained. Nothing to salvage. No more scraps to use. Scrap bin in gray and white truly vanquished.
I really love how all the seams and the fabric variations on the top make this interesting despite it's rather humble and unimpressive origins. I stopped with a top that measured 64x80" because I really had nothing more to use. That's a size I can live with.

Stay tuned for part 2,  The back, the quilting and the reveal. Remember I have NO scraps left and my backs (for the last several years)  are cobbled from those leftovers. I have had several offers of additional scraps from dear quilting friends but I think I NEED to use what I have on hand and no other. I guess if I make another quilt before I get to the back, I could have some scraps to use, but I'm pretty sure the current color palette for my "next" quilt top is not what I have in mind.

Yet, another challenge and I've picked up the gauntlet.

Wednesday, November 30, 2011

Out with the old

Have you ever seen those funny photos in magazines where they have 2 photos side-by-side and you are supposed to find the 7 things that are different- (even though they look almost identical).

I have one for you……. Can you tell me what the difference is between picture ONE?

PICTURE #1
 and picture TWO????
PICTURE #2


Give up????? It's this beautiful and unique bag….. received from Michelle Lizcano (I like orange too).  I would start to sound like a Thesaurus if I even got started with all the things I LOVE about my new bag-  it's versatile and the fabric on the outside is this heathered grey and yet not "just plain grey" (I love fabrics like that), the many, many details, and the adjustable handle and…….well, let's just say I'm not the only one that had rave reviews, check out this list of accolades……

My new bag. The hardware holding on the handles comes on and off like a dream.

My "stuff" in my new bag (I was bowled over by the details ,and the colors, and the modern organic lines of this very beautiful bag. ) I have seen this new fabric on line but hadn't yet purchased any. It's beautiful and playful and perfect for me. (I love this color yellow).

Oh, and if the bag were not enough,  I did get my goodie bag filled with goodies (The dog didn't come in the mail), she's mine.
 The gorgeous bag was filled with "spicy" colored fabrics, many which are new to me and a charm pack of the new Lotta Jansdotter Echo fabric and a shorter handle so I can do a presto- chango with my cross body bag and make it into a hip folded-over going-out bag.


The "back/front" of my bag with beautiful hand stitching

close-up of the hand stitching, the grey against the aspen- so beautiful. See what I mean about the fabric- grey, but not only grey- 
So, this bag is mine.  I am truly grateful that, someone I didn't know, but hope to now know better (we are western "neighbors" so-to-speak), would be able to figure me out just from what I've commented on (am I revealing too much???- are you a mind reader????). Michelle, this beautiful bag is more me than you can possibly know; NO WAIT, you do know- you nailed it!! If this bag could be bought, I'd buy several!!! I LOVE cross-body bags. I NEED pockets to put the few things I do carry in their places. I love to travel, so being able to take one bag that can fit what I need, yet chameleon into an almost totally different bag to take out is MORE than perfect. The colors and design are timeless and traverse any season or occasion that I could ever imagine. It's not too big, and not too small…..it's PERECT, and I am very, very thankful that it found it's way to my home.

Sunday, July 24, 2011

Challenges and Swaps and challenging swaps!

My Sunday installment of Stashtacular round ups, swaps and although not a swap, our next guild challenge. "Sew" I mentioned last Sunday my Sewn Spaces Swap, needle book cover, Mr. Mouse. Well, this week, I received (and scored the jackpot!) my needle book cover- from Suzettra.

My chosen color was turquoise and I actually commented that I loved this one, but thought it couldn't possibly be for me because it said "Pinks" on the front. Sneaky, sneaky. Suzettra did some awesome stalking because, although she used some pink fabric, the "Pinks" refers to flowers not the color and one of my other favorite things to do is garden. The center of my needle book holder has a wee hedgehog and a squirrel and beautiful hand stitching. Lots of fun, fun fabrics are pieced on the outside and my package also contained a wee pincushion and some turquoise and red floral fabric and "thread". I loved everything about it and will use it.

Which brings me to some of my thoughts about the Needle book swap and my guild challenge. Initially I toyed with a sewing case and not a needle book, but it seems that the overwhelming majority of folks were doing the needle book and what had in my mind (for a sewing case) I just didn't have the time to execute properly. (There were a few design details I had to ponder and work out). So, using my quilt guilds' Jay McCaroll Habitat Fabric Challenge (Habitat for your Habitat) as an opportunity- free fabric, 1/4yd by 1/2 the width of the fabric (fat eight's) chosen from what was so generously donated by Freespirit Fabrics- my guild sorted and cut and gave everyone 6 random pieces…….
The quilt guild fabrics, I used the three on the right. 

 …..and send us off to make what ever we wanted. The only "rules"were that the Habitat fabric be showcased in the project we chose. Have you seen this fabric? It's pretty edgy- I'm still trying to figure out how some of it goes together- Here is what Generation Q Magazine had to say:


Habitat by Jay McCarroll (FreeSpirit/Westminster Fibers)
Jay McCarroll of Project Runway fame is getting tons of attention these days with his new line from FreeSpirit, Habitat. These edgy, bold prints are definitely not fussy and matchy-matchy, as you’d find in many collections with lesser punch. Instead, each print is unique and stands strongly on its own, yet plays nicely with its sister cuts. There are three colorways in Habitat, and we picked the boldest teals and plums to share with you here. Plus, there’s a very soft pink and beige combo that feels much more girlie and a dark pink and olive collection that will give us something crisp to cling to, after weathering the summer’s heat. We can  envision some incredible, creative bedding from these highly energetic prints, but there’s also a life beyond patchwork here. Can’t you just see these stretched over canvas and hung on the wall as art? Move over, Marimekko!


So, you see, it's not just me- anyway, I chose 3 of the 6 that I though looked best together (there was no requirement that we use some of every fabric this time), added one additional Habitat fabric
my fabric addition, also habitat
 ( a safe polka dot) and a Kona coal (med-dark gray) and decided I would make my sewing kit. My "design" (still in my head and still in my head)
one side, with the Kona coal

the other side

 featured a zip around zipper that when unzipped would lay the sewing case flat, for easy access to its contents. Small enough to travel with, yet big enough to hold sewing supplies.
interior without supplies, yet
My finished piece is around 8.5" x 4.5"x 2.5". And the BEST thing is that it easily fits my Oh So Lovely Needle Case and pin cushion (from Suzettra) as well as a few other vital sewing supplies.
Interior with scissors, measuring tape, threads and needles

interior with my lovely needle case and pincushion
I still have fabric left over from the 3 Habitat fabrics that I didn't use. I still could make something from these. I'll let you know if I do.
Finished sewing kit with habitat fabrics pieced on the sides and pieced around the zipper.

Lessons learned:
1. I need to plan ahead slightly better. I get on a roll and the next thing I know I wish I had done something that I did not.  Now that I have made one, I can make my life a whole lot easier making the next one with what I learned.
2. I used some of my stash to finish this case (Kona coal and a zipper)
3. I'd need to make hundreds of these to make a serious dent in my stash. (so, what's new).
4. With minor modifications to the size and zipper placement this would be a great bag for make-up and a great size for travel.
5. The zipper was much easier to put in than I thought it might be.

Additional thoughts: I still have Habitat fabric left over- I should participate by making some of the tutorials in the STASHTACULAR. So, more Habitat for my habitat that's STASHTACULAR and Fancytastic too boot!- to go with my sewing case-
Habitat fabrics pin cushion, STASHTACULAR tutorial by Kelly. Don't know about you (and I did do this on purpose) but the fabrics and the color contrast remind me of those "radiation" symbols they put up in hazardous places…… Photographed on a piece of Habitat fabric I had yet figured out how to use.
And then, my Habitat apron with a STASHTACULAR tutorial by Jenna. Hope Jenna doesn't mind, but I made the border smaller (working with the Habitat fabric I had) and added a double welted pocket. (I need a pocket in my apron).

Lessons learned:
1. make the double welted pocket BEFORE you sew the pleats and put the waist band on the apron.
2. always practice this pocket finish before you dive into your project (I don't usually do this, but did this time and was very happy I did), My first attempt wasn't as precise.
3. I like the topstitched pleats- makes it a bit more "industrial".
4. Always try and photograph your finished projects in good natural light (not late at night when you finish them in a dimly lit basement).
Used the orange Habitat fabric (yay- thought I might actually have to wait till Halloween). Pieced the waist and the bottom border/hem. The pocket is made "double-welted" from a tutorial HERE. Apron background fabric, Kona coal from my stash.

Pocket close up, just big enough for my phone. 

 Hope your weekend is what you had hoped it would be!!!